Continuing from my introduction in part 1, I’ll just jump straight into the process. I downloaded the latest version of concrete5 from the projects home page at concrete5.org. I then went ahead and installed it on my local web server I created using WAMP. This is a great program for those wanting an easy installation of an Apache, MySQL and PHP server stack in a Windows environment.
1 I have setup a blank installation of concrete5. This option doesn’t provide any sample data for the website. So all that is on the website is a blank home page with the site title and some links to the concrete5 project home page. So i will begin by creating some empty pages in the “Full sitemap” option in the concrete5 dashboard.These pages are titled in the similar manner as they are appear in the HTML template. I will end up having pages called “home” (default), “services“, “clients“, “testimonials” and “contact us“. When i am finished i will end up having these new pages show up only in the “Full sitemap” because there are no content blocks on the website to call these pages.
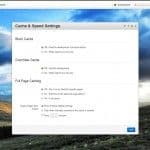
2 For the sake of seeing the updates easily as i make them during this conversion process, i will disable caching options for now. The options are located under “System and Settings” in the dashboard, then “Cache and Speed Settings“. In these options i will disable the “Block Cache” and “Overrides Cache“. Now on to converting.
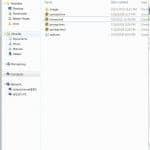
3 I will begin by placing the downloaded HTML theme in the “themes” folder that is located in the root of the concrete5 installation. Next i will create a description text file called “description.txt” in the theme folder. This file will contain a short simple description of our theme with the theme name on one line and a short description on the second line. This the information the concrete5 dashboard will use to describe our theme under the theme installation section. Keep it short and simple.
4 Next i rename the “home.html” that came with the theme to “default.php“. The reason i choose the “home.html” file is the the home page of the theme uses a 2 column layout which all the other pages use. I guess you could say it’s a rule of thumb to pick the most common layout type and use it for the “default.php” file which every concrete5 theme ought to have. So your choice may differ depending on the layout of your starting theme.
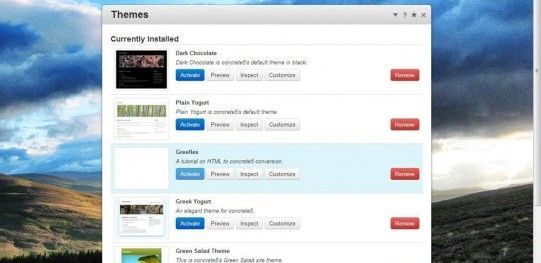
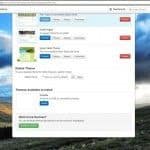
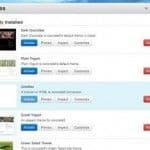
5 Now that i have created the “default.php” file, i am going to create a “view.php” file i will leave it empty for now. This now gives me the minimum requirements for a concrete5 theme as i now have a blue “Install” button along with the theme’s name and description. The thumbnail is blank because i haven’t created one, I’ll get to that later. After i click the “Install” button the theme now shows up in the “Currently Installed” list and it now it has an “Activate” button. So I’ll activate the theme and go to the home page.
6 On the home page i can see that something worked because instead of having the default blank concrete5 page. I now have a home page with plain text and blank image holders but no styling. So looking at this page i can see that the style-sheets and images are not being loaded by the browser. This where i am going to need concrete5’s own PHP functions to get things to work correctly.
I will continue in part 3 with some code swapping and insertion with my favourite code editor – Notepad++
For visual aid on my process please see the screenshot below


Recent Comments