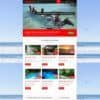
Picking up where we left off in part 2, we now have a theme that is kinda working. We am not seeing the text styling and the background images because the concrete5 application is not able to correctly resolve the associated files paths for the stylesheet and images. So to get this issue resolved we are going to need a text editor and some PHP. We are going to continue by showing the markup that came with the HTML theme, then we will remove the relevant markup and replace it with PHP. So lets begin.
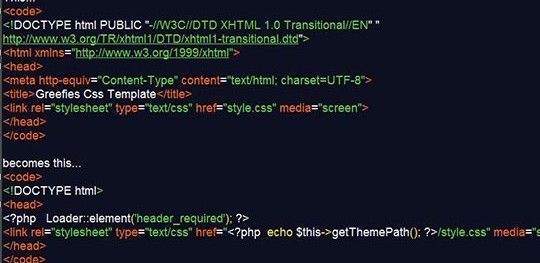
7 In the original HTML markup, there is a doctype of XHTML which we will change to a HTML doctype for the sake of being HTML5 complient and having access to the associated HTML5 markups such as “articles” and “quotes“. Continuing on we have some static “charset” and “title” tags, let’s replace those with a line of concrete5 PHP which will pull that information automatically. Next piece to look at is the stylesheet, it is located in the root of the theme directory but the concrete5 application need a piece of PHP to resolve the file path correctly. See the code below for clarity.
<!DOCTYPE html PUBLIC "-//W3C//DTD XHTML 1.0 Transitional//EN" "http://www.w3.org/TR/xhtml1/DTD/xhtml1-transitional.dtd">
<html xmlns="http://www.w3.org/1999/xhtml">
<head>
<meta http-equiv="Content-Type" content="text/html; charset=UTF-8">
<title>Greefies Css Template</title>
<link rel="stylesheet" type="text/css" href="style.css" media="screen">
</head>
<!DOCTYPE html>
<head>
<?php Loader::element('header_required'); ?>
<link rel="stylesheet" type="text/css" href="<?php echo $this->getThemePath(); ?>/style.css" media="screen">
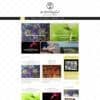
</head>8 After the above step when we reload the home page, we’ll now see all the text styling and background images called by the CSS stylesheet. At this point all that this is absent on the hompage are the images located in the images folder. Just like with stylesheet the concrete4 application is unable to resolve the path to the images folder. So we can fix this by appending the file path to all the image files with the PHP code we used above with the stylesheet.
<div id="logo"><a href="home.html"><img src="images/logo.gif" alt="" title="" border="0"></a></div>
<img src="images/clock.png" alt="" title="">
<img src="images/pic1.jpg" alt="" title="" class="left_img">
<img src="images/box_icon.gif" alt="" title="" class="box_img">
<img src="images/box_icon.gif" alt="" title="" class="box_img">
<input src="images/search.gif" class="submit" type="image">
<img src="images/phone_icon.gif" alt="" title="" class="box_img">
<img src="images/contact_icon.gif" alt="" title="" class="box_img">
<div id="logo"><a href="home.html"><img src="<?php  echo $this->getThemePath(); ?>images/logo.gif" alt="" title="" border="0"></a></div>
<img src="<?php  echo $this->getThemePath(); ?>/images/clock.png" alt="" title="">
<img src="<?php  echo $this->getThemePath(); ?>/images/pic1.jpg" alt="" title="" class="left_img">
<img src="<?php  echo $this->getThemePath(); ?>/images/box_icon.gif" alt="" title="" class="box_img">
<img src="<?php  echo $this->getThemePath(); ?>/images/box_icon.gif" alt="" title="" class="box_img">
<input src="<?php  echo $this->getThemePath(); ?>/images/search.gif" class="submit" type="image">
<img src="<?php  echo $this->getThemePath(); ?>/images/phone_icon.gif" alt="" title="" class="box_img">
<img src="<?php  echo $this->getThemePath(); ?>/images/contact_icon.gif" alt="" title="" class="box_img">
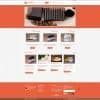
9 So after the previous step and another refresh of the homepage, all the images and styling are now being displayed. The theme still has static content but the styling is dynamic. So we are getting there, just a couple more steps. Also the theme’s container div has been pushed down by about 50px. This space being made available for the concrete5 admin toolbar but its not showing. We will fix that by adding 1 line of PHP before the closing “body” tag.
<?php Loader::element('footer_required'); ?>This line of concrete5 PHP will add the necessary div for the toolbar and its needed jQuery UI scripts.
10 Next we will move on to the static navigation bar and change it to one that is dynamic. This is also where we get our first intro to “blocks” and “stacks” – wherein lies the greatest power of concrete5. We will go ahead and create a “stack” with a name of “main Nav” and we’ll also add an “Auto-Nav” content block to it. The term “stack” means that the area is global on all the website pages and the “content block” is an area of pre-defined code such as a contact form or Google map. So in “default.php” where we have an unordered list in the “menu” div we will replace that markup.
<div id="menu">
<ul>
	<li><a class="current" title="" href="home.html">home</a></li>
	<li><a title="" href="services.html">services</a></li>
	<li><a title="" href="#">clients</a></li>
	<li><a title="" href="#">testimonials</a></li>
	<li><a title="" href="contact.html">contact us</a></li>
</ul>
</div>
<div id="menu">
<?php
$a = new GlobalArea('Header Nav');
$a->display();
?>
</div>
So now our website navigation is dynamic and now pulls its items from concrete5’s site map. The only thing now is that the content on the website is still static and uneditable. Also all the pages on the website look the same because they are all using “default.php” to pull their content.
In part 4 we will change the static areas of the website so that it is dynamic and editable. We will also create new page types for the other pages on our website.